PAWS - Designate Access
Troubleshooting
Designate Access Account is Being Sent to Sign In with Microsoft 365
- Designated access account names are case sensitive and should be in ALL CAPS. They should be typed exactly the same as they are displayed in the PAWS Designate Access menu for a student.
Example Designate Access account username: JDHERON_D1 - If the username is spelled correctly with correct capitalization, make sure the password is being put in correctly. If you still receive an error after making sure the password is right, follow the steps to Reset a Designated Access Account.
If you create a Designated Access Account, you should read about Family Educational Rights and Privacy Act (FERPA) first:
Student FERPA Consent
Create a Designated Access Account
Reset a Designated Access Account
Lock a Designated Access Account
View Designated Access Accounts
Replace an Old Designate Access Account
Create a Designated Access Account
- Log onto your PAWS account.
- Select Student Information Release under the Personal Information section.

- After reading the FERPA Rights, click on the Designate Access button.

- After reading the conditions, click on the box for I agree to these conditions.
- Click Create Account.

- You can title the This Account is For then create a password and confirm it.
- Select the Access you wish to allow the Parent/Legal Guardian to have using the Give or Deny Access drop down menu.

- Click on Save at the bottom of the page.
If you have access to your Office 365 School E-Mail account, you will also receive a message confirm the account creation as well as a link to the Acceptable Use Policy
The following video provides instructions on creating and logging into a Designated Access Account:
Reset a Password for a Designated Access Account
- Go to the Designated Access page, following steps 1-3 from the previous section.
- Click on Reset Password for an account.

- Enter in a password and confirm the password that meets UWM's password requirements. For a guide on UWM's password requirements click the following link: UW Milwaukee - How To - Password Complexity Requirements

4. Hit Save.
You will get two messages in your Office 365 E-Mail account confirming that you reset the password for that particular Designated Access account.
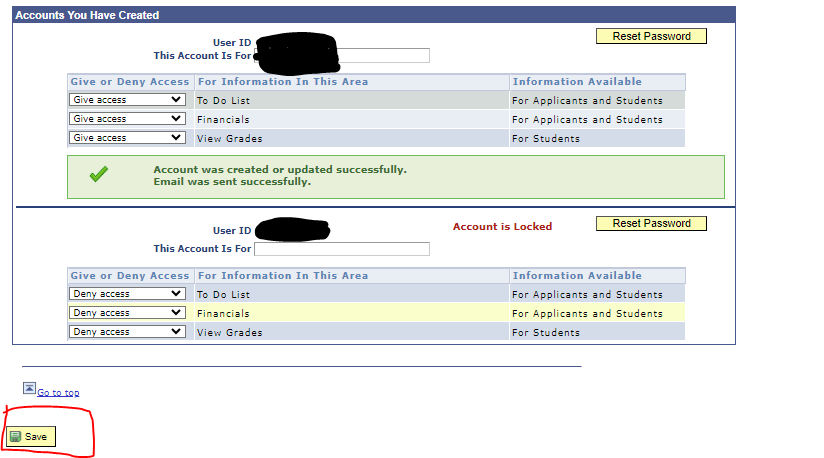
Lock a Designated Access Account
- Go to the designated access accounts page, following the first few steps from the previous section.
- Use the drop down bars and select Deny Access for all three.
- Hit Save.

When you refresh the page, it will say that that particular designated account is locked. To unlock it, just select on of the options' drop down menu and select Give Access.
View All Designated Access Accounts
Note: the page to view all Designated Access Accounts will not appear if you do not have any Designated Access Accounts affiliated with your PAWS.
- Under Personal Information, click Grant Access to Others.
- View your current accounts.
Replace an Old Designate Account
- Under Personal Information, click Grant Access to Others.
- View your current accounts.
- Select the account you would like to replace.
- Click Reset Password.
- Enter a new name in the This Account Is For.
- Create a new password.
- Confirm the new password.
- Choose what areas this new account may access.
- Click Save.
Note: Account access is not reset by the University. Created accounts will be active for as long as the student’s PAWS account is active. Students are responsible for all updates to logins and passwords for each account.