Printing (How To) - Ricoh Locked Printing Feature
Printing Preferences
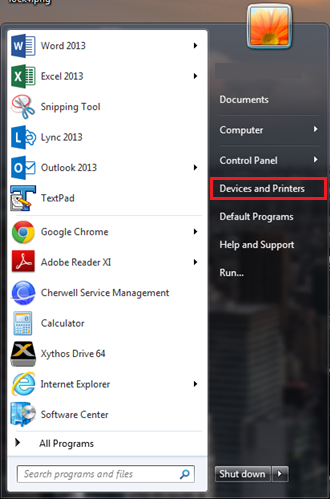
1. Open the Start Menu in the bottom left corner of your screen. This can also be accomplished by pressing the Windows key. Select Devices and Printers.
NOTE: In Windows 8, you may have to type "Devices and Printers" while at the Start Menu if it is not seen by default.
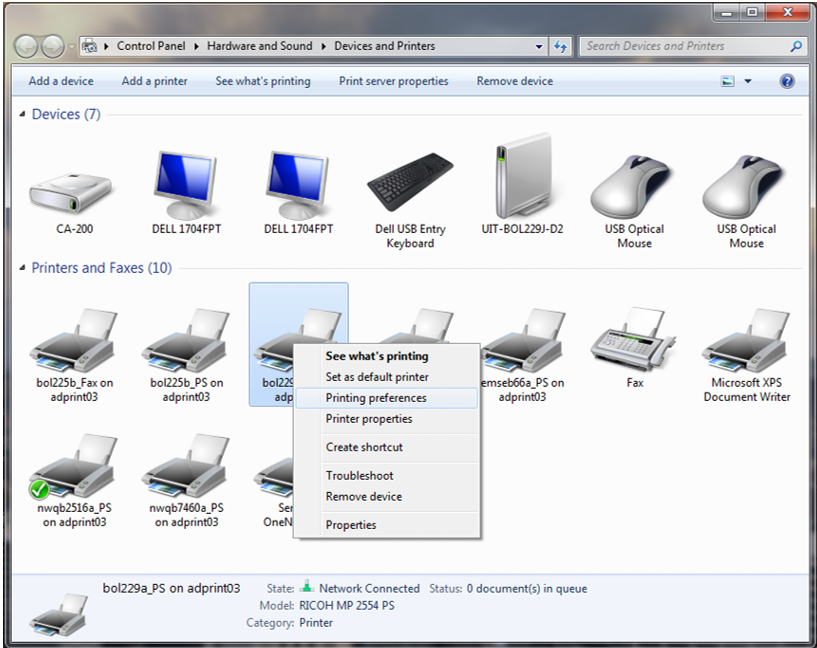
2. Right-click on the desired printer and select Printing preferences.
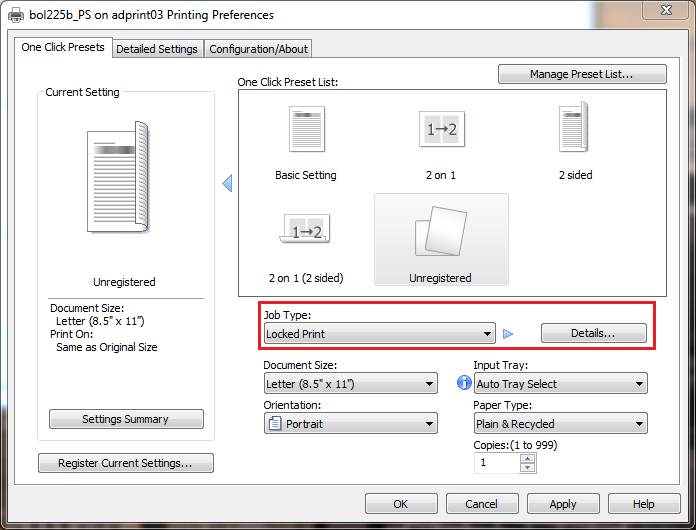
NOTE: The following steps may have to be performed multiple times depending on the types of printers that you have connected. In the printer name, you will notice a room number followed by an _PS or _PCL. These are two different kinds of print drivers. The pictures below will include steps for both. Locked printing is not supported on the Ricoh SP C430 DN printer.
PS Driver Printers
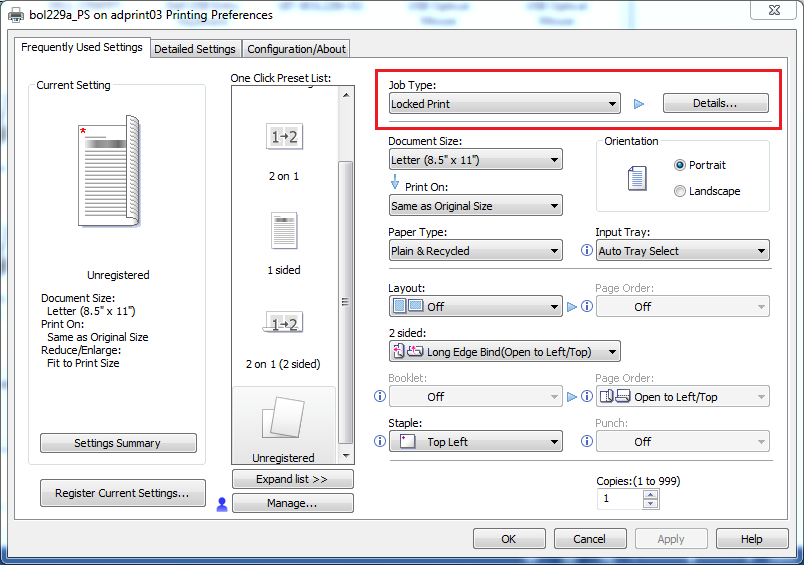
1. Under the Job Type: menu, select Locked Print and click the Details... on the right.
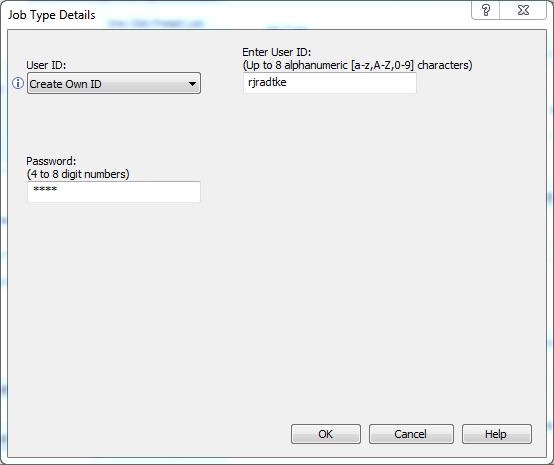
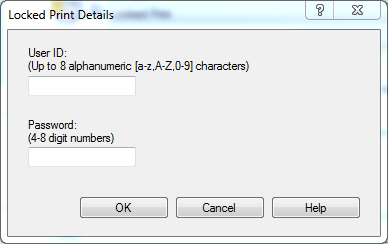
2. Create a username in the Enter User ID: box. It is recommended to use eight characters of your ePanther ID. The username can be less than eight characters but cannot exceed eight characters.
3. The Password: box in the lower left corner is where you create a PIN number between four and eight characters.
NOTE: Hold Print (another option under the Job Type menu) functions the same way as Locked Print but does not require a password. It only requires that a User ID be created.
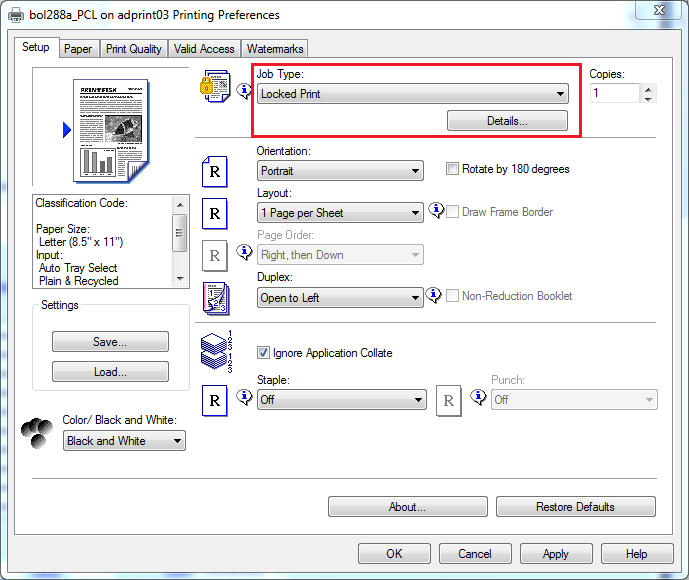
NOTE: If the Printing Preferences window does not look like the screenshot above, it will look like the screenshot below.
PCL Driver Printers
1. Under the Job Type: option, select Locked Print and click the Details... on the right.
2. Create a username in the Enter User ID: box. It is recommended to use eight characters of your ePanther ID. The username can be less than eight characters but cannot exceed eight characters.
3. The Password: box in the lower left corner is where you create a PIN number between four and eight characters.
NOTE: Hold Print (another option under the Job Type menu) functions the same way as Locked Print but does not required a password. It only requires that a User ID be created.
Ricoh Touch Screen
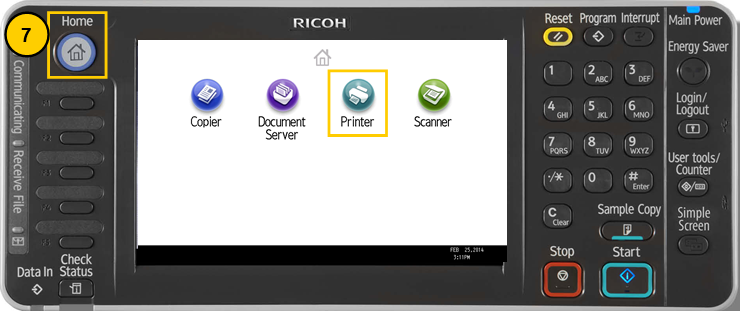
1. Click Home in the upper left-hand corner, and select the Printer icon.
2. Touch Print Jobs and touch your user ID under the Select User ID section.
3. Locate the appropriate file, touch it, and then touch Print (in the lower right-hand corner).
NOTE: More than one file can be selected.
4. Enter your password with the number keypad and press OK.
5. Confirm the previous step by pressing Print.
NOTE: You can change the quantity of the print job on this screen. Just enter the number of copies you desire with the number keypad.
6. The printer should now process your print job. Click Exit (in the upper right-hand corner) to return to the main screen.


