Microsoft 365 (Outlook 2016) - How to Export/Import Email
When individuals are entering the deprovision cycle, exporting and importing mail can be important to maintain important emails and attachments. This document explains how to do so in Outlook 2016.
Export
1. This export process needs to be done in the Outlook desktop user. All students and faculty can download a free copy of Outlook 2016 for Windows (part of Microsoft 365 ProPlus - download instructions).
2. After Outlook has been installed, it will need to be setup/configured: Outlook 2016 - Windows Configuration
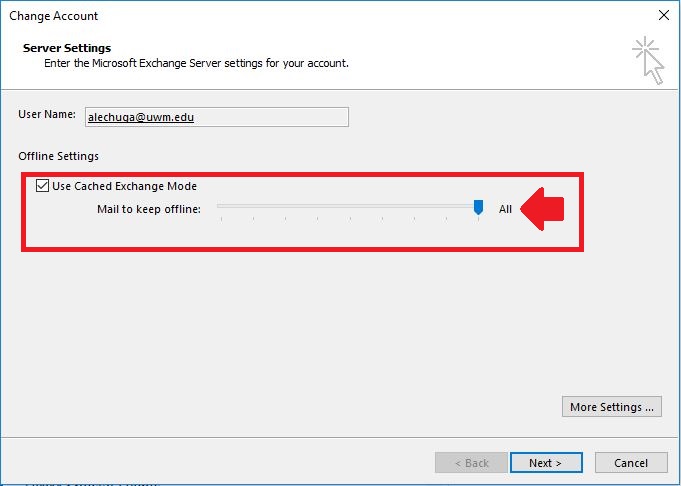
3. The account in Outlook must have the offline cache mode set to All. This way, all the e-mail is downloaded locally. To do so, click File, followed by Info, then Account Settings, and finally Account Settings... After selecting your account, click Change... and move the Mail to Keep offline slider to All.
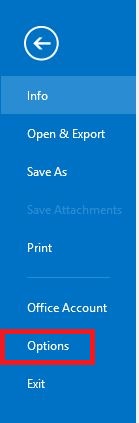
4. After the slider has been set to All, select File in the upper left-hand corner and select Options.
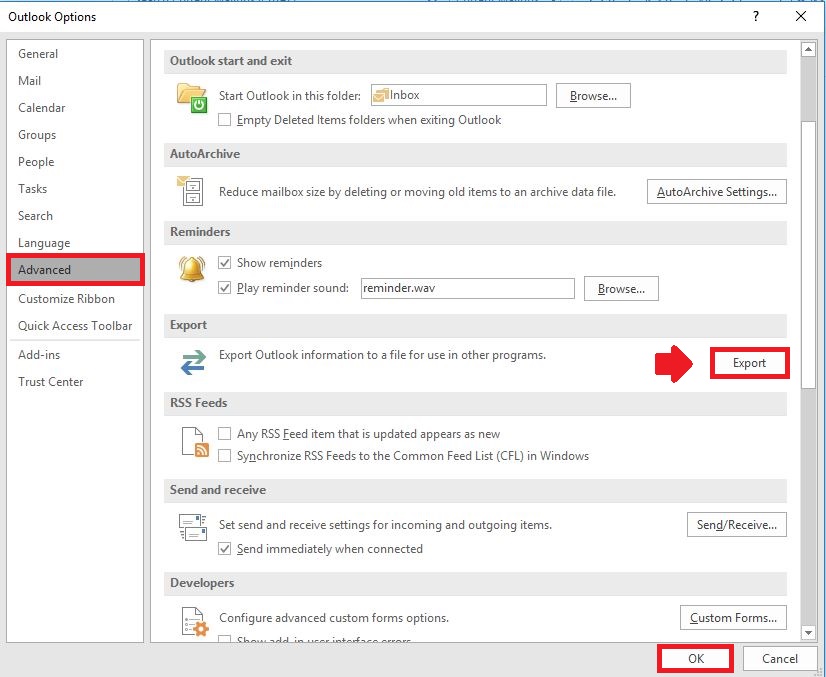
5. In the Outlook Options window, select Advanced along the left-hand side, and click Export under the Export heading.
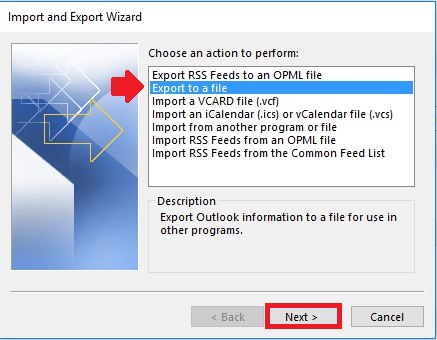
6. In the Import and Export Wizard window, select Export to a file, and then select Next >.
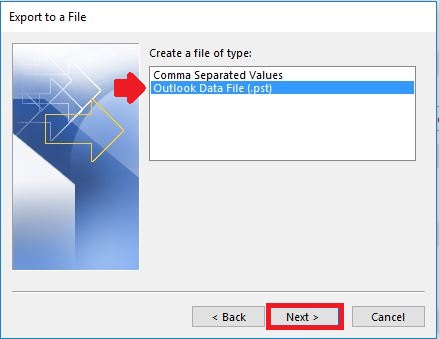
7. In the Export to a File window, select Outlook Data File (.pst), and then select Next >.
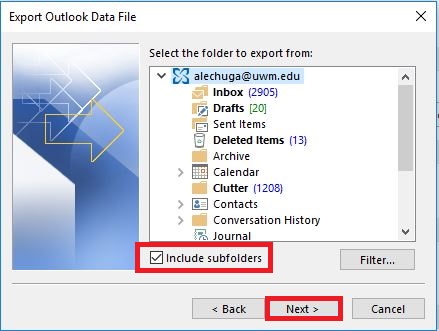
8. In the Export Outlook Data File window, select the desired folders to export. It is probably best to select the top heading which will be your ePantherID@uwm.edu. After this, make sure to check the box next to Include subfolders. Click Next >.
9. In the Export Outlook Data File window, select Finish.
NOTE: Select Browse... to save to a different location on your computer or rename the .pst file.

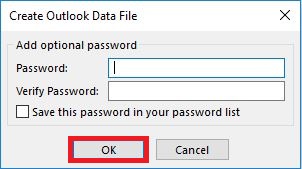
10. In the Create Outlook Data File window, choose whether or not to enter a password and select OK.
NOTE: Choosing a password is optional. If you make a password and forget the password, there is no way to retrieve it or open the .pst file being created. Be sure to keep track of any password created.
NOTE: Choosing a password is optional. If you make a password and forget the password, there is no way to retrieve it or open the .pst file being created. Be sure to keep track of any password created.
Import
1. To import a new email account into Outlook, select File in the upper left-hand corner, followed by Info, then Account Settings, and finally Account Settings....
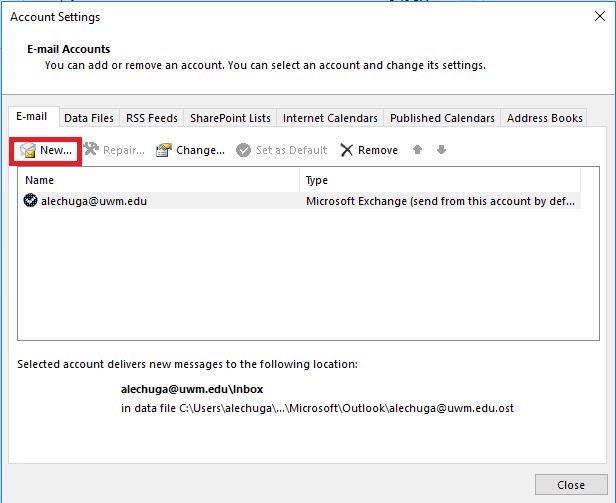
2. In the Account Settings window, select New... under the Email tab.
3. The link to the following article explains how to add an alternate email address in Outlook 2016
Office 365 (Outlook 2016 for Windows) - Send mail using your alternate address
4. After the account is setup (Gmail, Hotmail, Yahoo, etc.), the .pst that was created during the export phase can be imported. Go to File in the upper right-hand corner, click on Open & Export, and then click Import/Export.
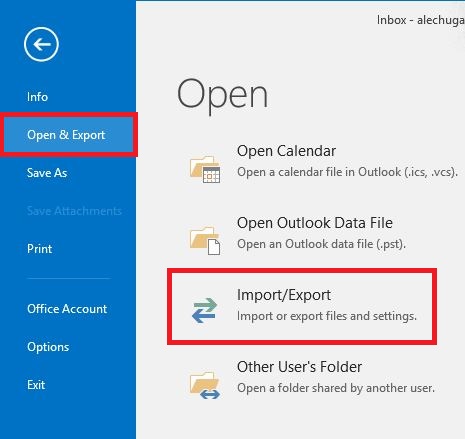
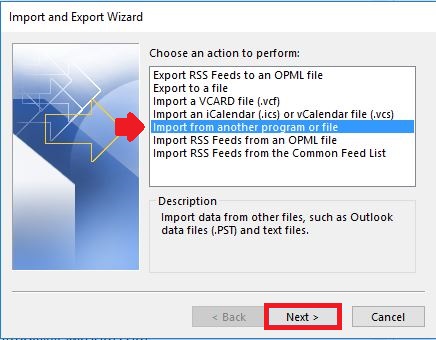
5. In the Import and Export Wizard window, select Import from another program or file, and then click Next >.
4. After the account is setup (Gmail, Hotmail, Yahoo, etc.), the .pst that was created during the export phase can be imported. Go to File in the upper right-hand corner, click on Open & Export, and then click Import/Export.
5. In the Import and Export Wizard window, select Import from another program or file, and then click Next >.
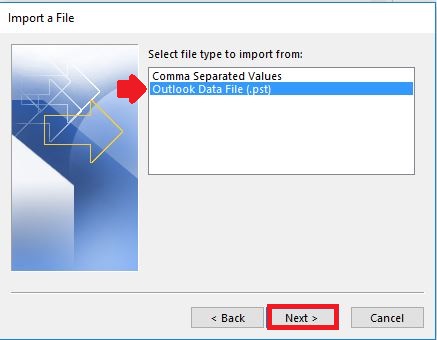
6. In the Import a File window, select Outlook Data File (.pst), and then click Next >.
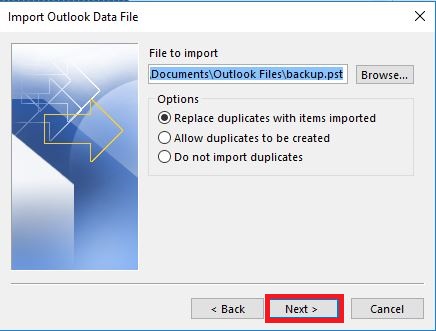
7. In the Import Outlook Data File window, select your .pst file (if you saved to the default location, it should automatically pull up the file location), and then click Next >.
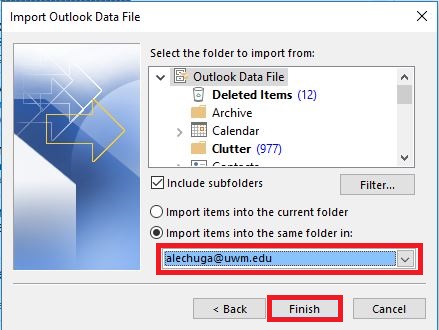
8. In the following Import Outlook Data File window, choose Import items into the same folder in:, and then, in the dropdown menu, choose the folder for the new account that was just created for the other email service. After this, click Finish.
NOTE: After the transfer is complete, login to the email service with which you created an account in the Outlook user, and verify that the emails have transferred to the other email service.
Additionally, the export and import process could take a very long time depending on how much email is in an account.
Additionally, the export and import process could take a very long time depending on how much email is in an account.