Topics Map > Microsoft 365 > Calendar
M365 Outlook (How To) Change Default Calendar Permissions
There are four basic permission levels that can be chosen for campus-wide calendaring sharing:
- Permission level definitions
-
- None
- No data is presented. This user will need to contact you to get any information.
- Free/Busy time
- View only start/end date/time
- Free/Busy time, subject, and location
- View only start/end date/time, subject, and location (except for "private" - which only allows free/busy)
- Reviewer
- View full details of all events (except for "private" - which only allows free/busy) - start/end date/time, subject, location, description, attendees, and attachments.
-
Important: At this time, Outlook users must be used to modify the global default permissions. Outlook on the web can only modify these permissions at a per-account basis.
- Calendar access control using Outlook (Windows)
- Calendar access control using Outlook (Macintosh)
- Calendar access control using Outlook Web App
Calendar access control using Outlook (Windows)
After you have configured your Office 365 account in Outlook, you may want to configure your default calendar sharing permissions as well. Note: If you are the owner of a resource and have subscribed to the resource calendar, you can also perform these actions for the resource. Just make sure you have performing these actions as the resource when following these steps.
- Start Outlook.
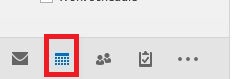
- Navigate to your calendar by clicking on the Calendar tab in the lower left hand corner of your Outlook user.
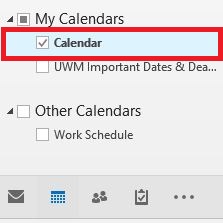
- At the calendar screen, select your default calendar, "Calendar":
- Right-click on the calendar and then click on the "Properties" field. This will open a dialog box that gives you further choices:

- Select the "Permissions" tab at the top of the dialog box that opens. The 'Calendar Properties' screen will be displayed:

The Default permissions level will be "Free/Busy time". When set to this value, this setting allows others to view whether you are free or busy, but does not allow others to see what you are doing during that time, nor with whom you are meeting.
- Make sure Default user is selected and use the options within the 'Read' box to change the desired default permissions for your calendar. To fully restrict others from seeing your calendar, set the "Read" permission level to "None". This setting will only restrict them from viewing your availability, they will still be able to invite you to a meeting. If you wish others to have greater access to your calendar, set read permissions to "Full Details" or "Free/Busy time, subject, location".
Please note the "Permissions" for the Anonymous user. Anonymous users are users who have not yet migrated to Office 365 or who are entirely outside of the University of Wisconsin - Milwaukee system. If you wish to change calendar viewing permissions for these groups, you will need to change these here. Do not delete this account/user.
-
When you are done setting your permissions, click on "Apply" and then click on "OK" to exit the Calendar Properties dialog box.
Calendar access control using Outlook (Mac)
After you have configured your Office 365 account in Outlook, you may want to configure your default calendar sharing permissions as well.
- Start Outlook.
- Navigate to your calendar by clicking on the Calendar tab in the lower left hand corner of your Outlook user.

- At the calendar screen, right-click on your default/primary calendar, "Calendar", and select "Properties":

- Select the "Permissions" tab at the top of the dialog box that opens. The 'Calendar Properties' screen will be displayed:

The Default permissions level will be "Free/Busy time". When set to this value, this setting allows others to view whether you are free or busy, but does not allow others to see what you are doing during that time, nor with whom you are meeting.
- Make sure Default user is selected and use the options within the 'Read' box to change the desired default permissions for your calendar. To fully restrict others from seeing your calendar, set the "Read" permission level to "None". This setting will only restrict them from viewing your availability, they will still be able to invite you to a meeting. If you wish others to have greater access to your calendar, set read permissions to "Full Details" or "Free/Busy time, subject, location".
Please note the "Permissions" for the Anonymous user. Anonymous users are users who have not yet migrated to Office 365 or who are entirely outside of the University of Wisconsin - Milwaukee system. If you wish to change calendar viewing permissions for these groups, you will need to change these here. Do not delete this account/user.
-
When you are done setting your permissions, click on "OK" to save and exit the Calendar Properties dialog box.
Calendar access control using Outlook Web App
- Open Outlook on the Web.
- Navigate to your Calendar

- At the calendar screen, right-click your default calendar, "Calendar", and select "Sharing permissions".

- Next to "My Organization", click on the drop-down menu and select the desired permissions level. This will grant that level of permissions to anyone who opens up your calendar. The default permissions level will be "Can view when I'm busy". When set to this value, this setting allows others to view where you are free or busy, but does not allow others to see what you are doing during that time, nor with whom you are meeting.
*IMPORTANT! If you change the permissions level of "My Organization" to "Can edit", this gives EVERYONE who views your calendar the permission to edit the events on your calendar. This is highly NOT RECOMMENDED.
- When you are done settings your permissions, click the "Done" button to close the window.