Topics Map > Microsoft 365 > Calendar
Office 365 (Outlook on the Web) - Sharing Resource Calendars and Changing Permissions
These instructions will show an owner of a resource calendar how to open the resource calendar, share the resource calendar, and change individuals' permissions on the resource calendar.
Contents:
- Opening a Resource Calendar
- Sharing a Resource Calendar
- Changing User Permissions for a Resource Calendar
Opening a Resource Calendar
Follow these steps to open a resource calendar as a shared mailbox.1. From the Outlook on the Web, click your name in the upper-right corner and select Open another mailbox...

2. In the open another mailbox window, type resource's name (e.g., BOL 210) and click Search Directory (if you've opened this resource before, the name may appear as you type).

3. Select the mailbox you wish to open from the menu.
4. Click Open and the resource's mailbox will open in another browser tab:

Note: If you do not have permission to access the resource, you will receive two possible error messages:
- A blank screen with the words "Bad request".
- An error message stating: "You don't have permission to open this mailbox". (This may appear after the first error message if you attempt to enter the resource again.)
5. Click the app picker ("waffle") icon from the upper left-hand corner and click on All apps:

6. Type in calendar, then click the calendar icon.

Sharing a Resource Calendar
1. From the Outlook on the Web, after opening the the resource calendar (using the instructions from the "Opening a Resource Calendar" section above), right-click on the calendar under "My calendars" on the left column of the page and select Sharing permissions:
2. In the screen that appears, type in the email addresses of the individual(s) with whom you would like to share the calendar in the search box and then click "Search Directory" to find the individual's name:

3. Once the individual's name has been populated, select the level of access you would like to grant to this user for the resource calendar:

The available permission levels are:
| Permission Level | Description |
| Can view when I'm busy | Shows only free/busy information |
| Can view titles and locations | Shows free/busy information including subjects and locations |
| Can view all details | Shows all information |
| Can edit | Shows all information and can edit/delete events |
| Delegate | Same as Editor plus receive/respond to invitations and schedule meetings |
4. Click the Done button to send the sharing invitation and grant the user permission:
Changing User Permissions for a Resource Calendar
1. From the Outlook on the Web, after opening the the resource calendar (using the instructions from the "Opening a Resource Calendar" section above), right-click on the calendar under "My calendars" on the left column of the page and select Sharing permissions:
2. A full listing of all of the individuals who have access to the resource calendar will be shown:
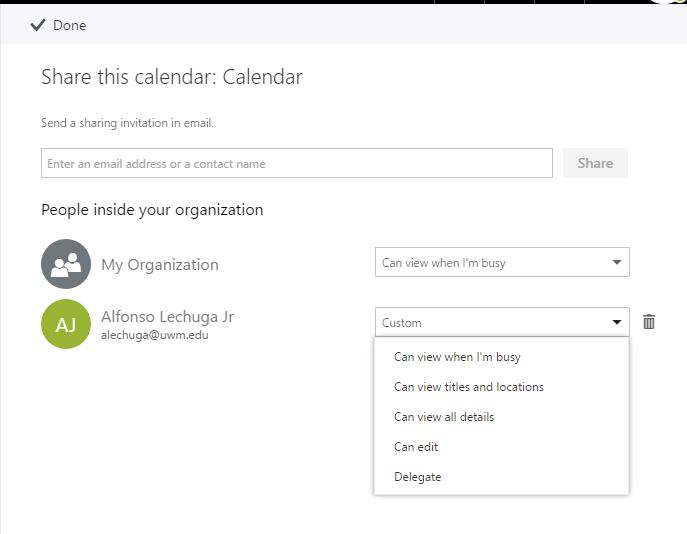
3. To change an individual's permission level, click the drop-down box to the right of their name and then select the permission level you would like to grant and click Done to apply the change:
The available permission levels are:
| Permission Level | Description |
| Can view when I'm busy | Shows only free/busy information |
| Can view titles and locations | Shows free/busy information including subjects and locations |
| Can view all details | Shows all information |
| Can edit | Shows all information and can edit/delete events |
| Delegate | Same as Editor plus receive/respond to invitations and schedule meetings |
4. To remove an individual's permission from the shared resource, click the Trash can icon to the right of the permission level drop-down list and then click Done to apply the change:
