Topics Map > Software
Windows Movie Maker (How To) Saving and Compressing Videos
Compressing your videos will be one of the last things that you need to worry about. However when it comes time to do so, you will need to be conscious of a few things:
- Resolution of your video (640 x 480)
- Bitrate
- File size of your video (200MB-500MB)
How to Produce Your Final Video:
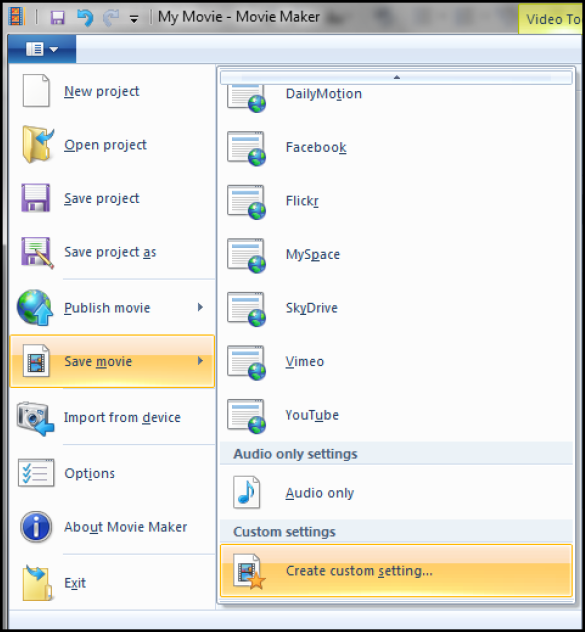
1. Click the Main File Menu in the upper left hand corner of your screen
.
2. In the drop down menu, hover over Save Movie and then click Create Custom Setting...
3. In the Custom Settings window, you are given several options for adjusting how your video will render. The first thing you might want to do is name your custom settings so you can reuse it again later. Here you will also be able to adjust your resolution and bitrate. These videos need to have a resolution of 640 x 480. In the Width box, enter 640 and in the Height box, enter 480.
4. Once you've adjusted the resolution, you'll need to adjust your bitrate. The bitrate is what will determine the file size of your video. edTPA files cannot be larger than 500MB and are recommended to be 200MB or less. If you type a number between 100 and 135,000 in the bitrate box, you will notice that it gives you an estimated file size. This estimated file size times the length of your video needs to be 200MB according to the edTPA standards. Finding the best bitrate will require some guessing and checking. Here are a some common bitrates:
5 Minute Video 5,460 kbps 10 Minute Video 2,730 kbps 15 Minute Video 1,820 kbps 20 Minute Video 1,365 kbps
5. Once you've adjusted all of these settings, you can click Save in the Movie Maker Custom Settings window. It will then prompt you to name and save your Custom Settings, and you can just click Save again. Then you can Close out of the Custom Settings window. You will be brought back to the editing screen of your video.
6. To produce your video with the Custom Settings you just created, return to the Main File Menu
NOTE: If you click Save Project instead of Save Movie, your file will save in the default file format, WLMP. The accepted file formats are:
- .flv
- .asf
- .qt
- .mov
- .mpg
- .mpeg
- .avi
- .wmv
- .mp4
- .m4v