Topics Map > Microsoft 365 > Calendar
Office 365 (Outlook on the Web) - Personal Calendar Sharing Permissions
This document will explain how to set sharing permissions for a personal calendar. These permissions will allow users certain levels of access to your calendar.
To Share Your Calendar
1. Log into your Office 365 account via Outlook on the Web (OotW).
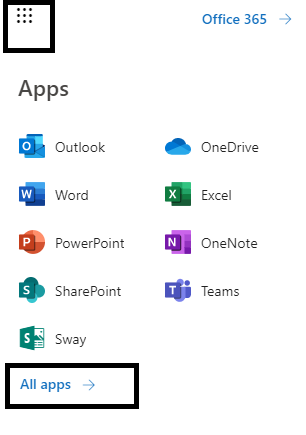
2. Open the app launcher tool in the top left corner of your Outlook on the Web window as shown below (outlined by the black box).
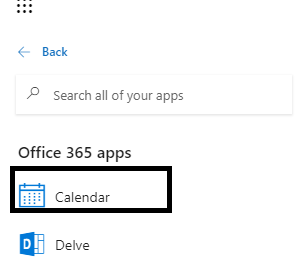
3. Select Calendar from the list of available apps.
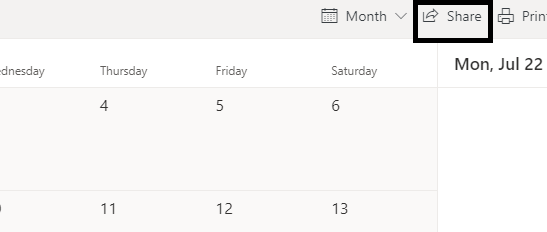
4. Click Share.
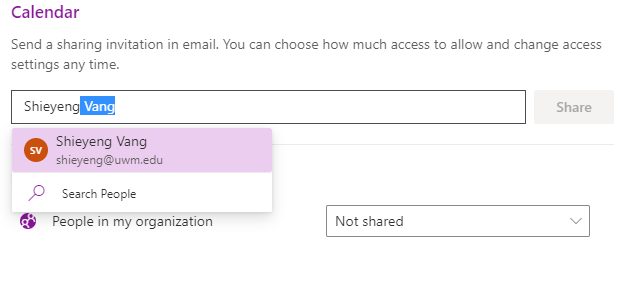
5. Search for a user by typing their name or email address into the Enter an email address or a contact name field. You can click Search Directory to search the Global Address List, or type in his/her full email address and letting it automatically find the correct address.
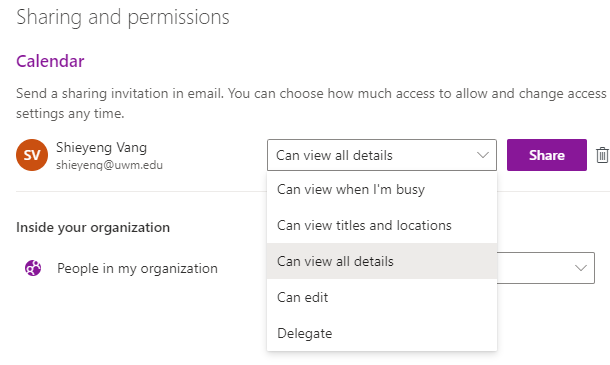
6. Choose his/her level of permissions by clicking the downward arrow next to his/her name. Use the table below to decide which level of permissions to grant that would best suit your needs.
Permission Options
Can view when I'm busy User can see blocks of "Busy" time on calendar but cannot see any details of the events Can view titles and locations User can see time, subject, and location of items on calendar but cannot see other details such as attendees, notes, or attachments Can view all details User is able to see time, subject, location, attendees, notes, and attachments Can edit User can create, read, edit, and delete all items, regardless of who created them. Events that invite the resource give the option to be accepted by anyone with this permission level. When an attendee is added, a notice that you forwarded the meeting request to additional recipients will be sent to the resource. When editing an event and adding attendees (at least when a room is invited), it will only update if the updates are sent to everyone. Delegate Delegates act on behalf of another person. If delegate access has been granted, copies of meeting requests will go to the delegate and the delegate can accept or deny the requests for the resource. A notification will be sent to the organizer saying that you have replied on behalf of the resource. This level of access should only be used if someone is completely managing the calendar of someone else.
7. Click Share once you have chosen the level of permission you would like to grant.
Note: The share notification sent to the user you are sharing with does not include their level of access.
To Edit or Delete Permissions
1. Open the app launcher tool in the top left corner of your Outlook on the Web window as shown below (outlined by the red box).
2. Select Calendar from the list of available apps.
3. Right-click on the Calendar in the "Your calendars" list and select Sharing permissions... from the list.
4. Find the user you are trying to edit/delete permissions for. To edit permissions, click the downward arrow next to his/her current permission level and change it to what you would prefer. To delete permissions, click the trash can next to his/her name to delete his/her permissions.
5. Click Done in the upper left corner when finished.
