Office 365 (Outlook 2016) - Work on behalf of a resource calendar
This article explains how to use the delegation features of Outlook 2016 to manage the calendar and mail for a resource calendar.
These instructions assume you have been granted appropriate permissions to the resource you are attempting to interact with. If you have problems interacting with the resource, contact the owner of the resource. If you do not know the resource owner, contact the UWM Help Desk at this webpage: UWM Help Desk.
- Opening the resource calendar
- Creating a new meeting for the resource
- Adding a resource mailbox
- Sending an email on behalf of the resource
Opening the resource calendar
Note: At a minimum, you will need free/busy permissions to open a resource calendar.
- Open Outlook 2016 and select the Calendar tab. It is located in the lower left corner.
- If you don't have the Resource added, you will need to add it to your calendar. To do this, right click Other Calendars and select Add Calendar and click Open Shared Calendar.
Note: Other Calendars is located above the calendar tab
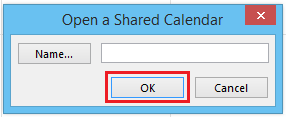
3. You will then be given a prompt to add the specific resource you are trying to access. Type in the Resource's name and select OK to have it search the directory for the calendar.
4. The resource will be listed within your Shared Calendars section and will continue to appear in your calendar view until you remove the calendar:
Creating a new meeting for the resource
Note: At a minimum, you will need Editor permissions to act on behalf of a resource calendar.
- From within the Calendar interface, click the New Appointment or New Meeting button to start the event creation process.

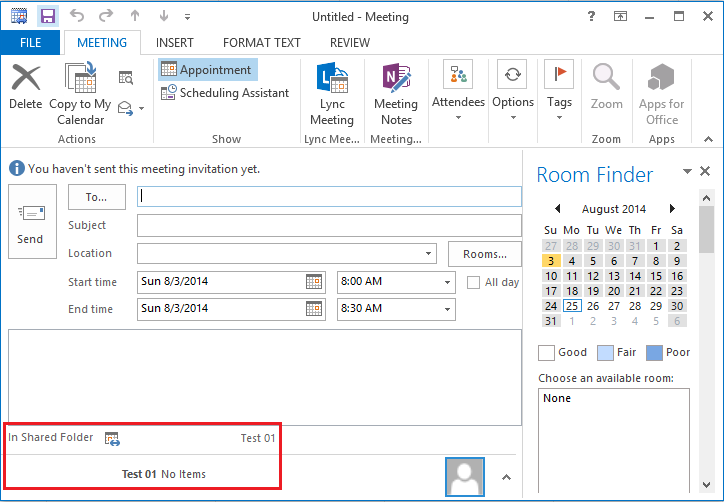
- Within the event edit screen, verify that the Resource name is listed in the bottom left corner.
- After you have filled in the rest of the desired fields (members you are inviting if it is a meeting, a subject if it is an appointment, the location, time, etc.), click the Send button (if it is a new meeting) or Save & Close (if it is a new appointment) to create the event.
Adding a resource mailbox
Note: At a minimum, you will need to be the owner of the resource or be granted full mailbox permissions to the resource calendar.
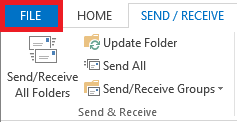
- Click Outlook's File tab.
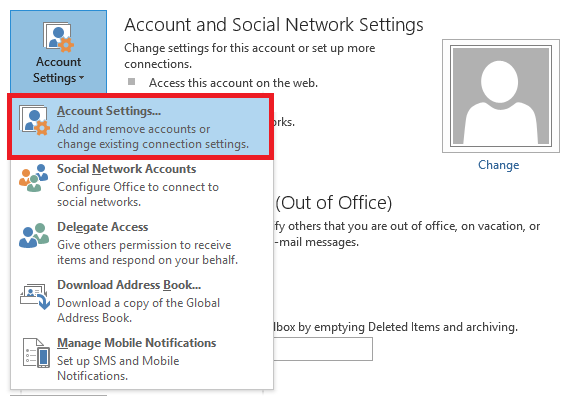
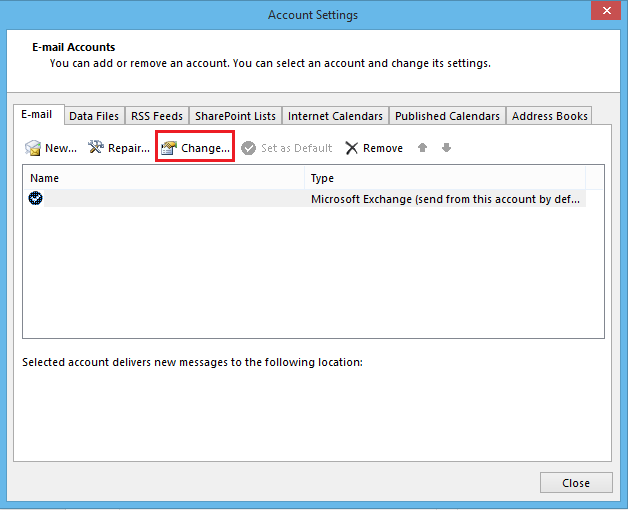
- Click the Account Settings button, then select Account Settings... from the list.
- In the Account Settings dialog box, make sure the account you wish to configure is selected and then click Change.
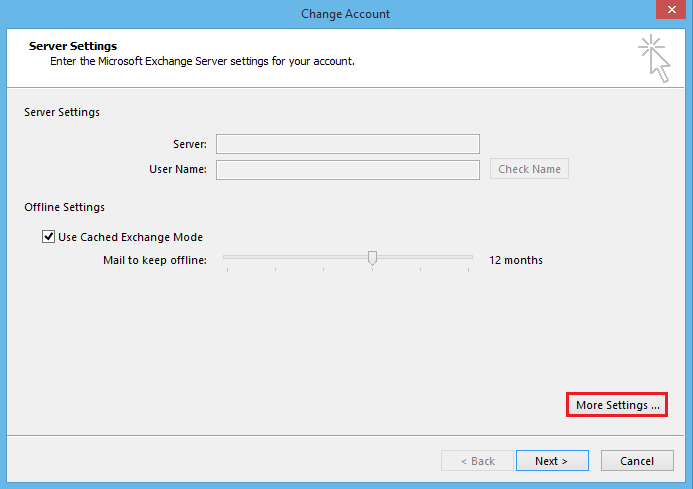
- Click More Settings.
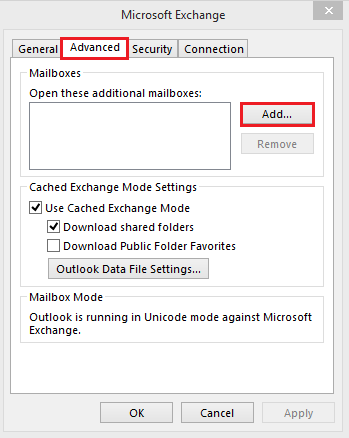
- Click the Advanced tab, then click Add.
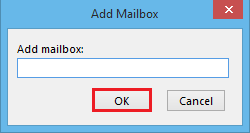
- Type the mailbox name of the resource whose mailbox you want to add to your user profile. If you do not know the mailbox name, ask the person who granted you viewing permissions. If you don't get the name exactly, the Exchange server will try to find the mailbox you're looking for. Once you've found the mailbox, click OK.
- Click OK to close the Microsoft Exchange dialog box.
- Back on the Change E-mail Account dialog box, click Next, then click Finish.
- Click Close to exit the Account Settings dialog box.
- You must restart Outlook (close and reopen) for the changes to take effect.
Sending an email on behalf of the resource
Note: You will need Send on behalf of permissions to the resource.
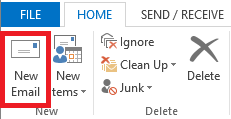
- Create a new message by clicking the New Email icon in the Home tab.
- On the message editor window, if you cannot see the From button, go to the Options tab and click on the From icon to show it.
- Click From. From the drop-down menu, click Other E-mail Address....

- In the Send From Other E-mail Address dialog box, type the sender's email address in the blank field and then click OK. If you are unsure of the address, see the next step. Otherwise, skip to step 6.
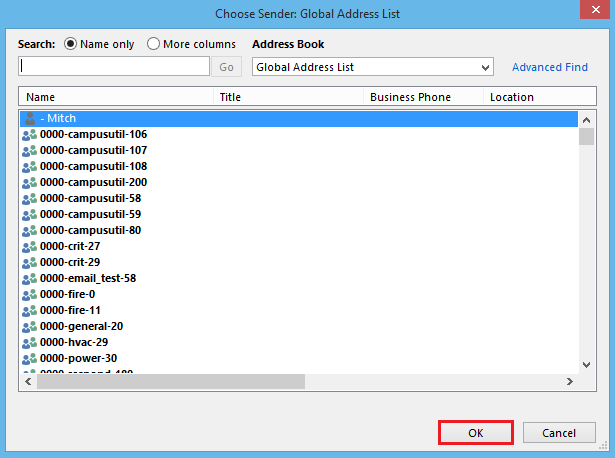
- If you are unsure of the address, you can search for it by clicking the From... button. Search for the address. Once you've found it, select and then click OK.
- It will return to the previous dialog. Click the OK button.
- Now you can see the email address is changed. Compose your message and, when finished, click Send.


